How To Connect AirPods To MacBook
Connecting your AirPods to your MacBook is a breeze! Follow these easy steps for a seamless sync:
- Open the lid of your AirPods case.
- On your MacBook, go to the Apple menu and click on “System Preferences”.
- Select “Bluetooth” from the menu.
- Click on “Connect” next to your AirPods in the list of available devices.
- Once connected, enjoy the seamless synchronization between your AirPods and MacBook!
Seamless Sync: How to Connect AirPods to MacBook
Apple’s AirPods have become the go-to choice for wireless earbuds, offering convenience and high-quality audio. If you own a MacBook and want to connect your AirPods seamlessly, you’re in the right place. In this article, we will walk you through the step-by-step process of connecting AirPods to a MacBook, ensuring a hassle-free experience. Whether you’re using AirPods Pro or the standard AirPods, the following instructions will work for all models. Let’s dive in and discover how to achieve a seamless sync!
How to Connect AirPods to MacBook: Step-by-Step Guide
Connecting your AirPods to your MacBook is a straightforward process. Follow the steps below to achieve a seamless sync:
Step 1: Ensure Bluetooth is Enabled
Before you begin, make sure that your MacBook’s Bluetooth is turned on. You can enable Bluetooth by going to the Apple menu, selecting ‘System Preferences,’ and then clicking on ‘Bluetooth.’ Ensure that the ‘Bluetooth On’ checkbox is ticked.
If the Bluetooth icon does not appear in the menu bar, you can enable it by going to ‘System Preferences,’ selecting ‘Bluetooth,’ and ticking the ‘Show Bluetooth in menu bar’ checkbox.
Once you have confirmed that Bluetooth is enabled, proceed to the next step.
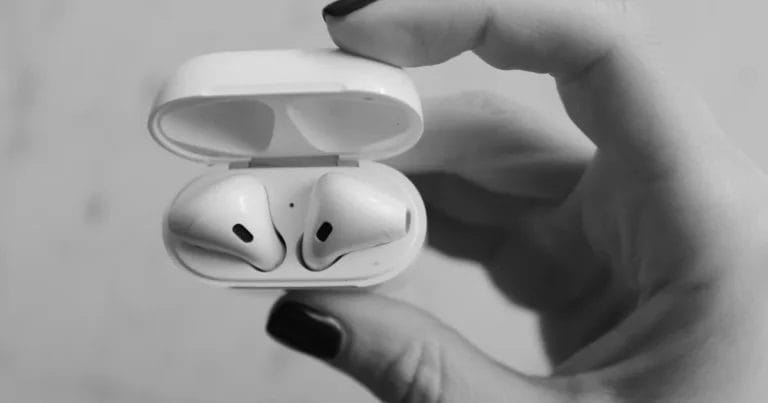
Step 2: Open AirPods Case
Open the case of your AirPods. Ensure that the AirPods are placed inside the case and that they have sufficient battery power. The AirPods should automatically pair with your MacBook if they are within proximity and the Bluetooth is on.
If the AirPods don’t connect automatically, try the following steps:
- Place the AirPods closer to your MacBook.
- Close the case and open it again to trigger the pairing process.
- Restart your MacBook and repeat the steps above.
Most often, the AirPods will connect effortlessly once the case is open and within range. If not, proceed to the next step.
Step 3: Manually Connect AirPods
If the automatic pairing process doesn’t work, you can manually connect your AirPods to your MacBook. Follow these steps:
- Go to the Apple menu and select ‘System Preferences.’
- Click on ‘Bluetooth.’
- Ensure that Bluetooth is turned on.
- Open the AirPods case and press and hold the setup button on the back of the case until the LED light on the front starts flashing white.
- In the Bluetooth preferences window, you should see your AirPods listed under ‘Devices.’ Click on ‘Connect’ next to your AirPods.
Your AirPods should now be successfully connected to your MacBook.
Step 4: Adjust AirPods Settings
Once your AirPods are connected, you can customize the settings to enhance your listening experience. To access the AirPods settings, follow these steps:
- Go to the Apple menu and select ‘System Preferences.’
- Click on ‘Bluetooth.’
- In the Bluetooth preferences window, you will see your connected AirPods listed under ‘Devices.’ Click on the ‘Options’ button next to your AirPods.
- Here, you can adjust settings such as changing the double-tap function, enabling noise cancellation (for AirPods Pro), and changing the microphone input.
Explore these settings to customize your AirPods according to your preferences.
Step 5: Enjoy Your Seamless Connection
Now that your AirPods are successfully connected to your MacBook, you can enjoy a seamless listening experience. Whether you’re watching movies, listening to music, or video conferencing, your AirPods will deliver high-quality audio without the hassle of tangled wires. Remember to keep your AirPods charged and connected to your MacBook, so you’re always ready to immerse yourself in your favorite content.
Troubleshooting Common Issues
While connecting AirPods to a MacBook is usually a smooth process, you might encounter some common issues along the way. Here are some troubleshooting tips for the most common problems:
Issue 1: AirPods not appearing in Bluetooth Preferences
If your AirPods are not appearing in the Bluetooth preferences window, try the following steps:
- Close the Bluetooth preferences window and reopen it.
- Restart your MacBook and try connecting the AirPods again.
- Reset the AirPods by placing them in the case and pressing and holding the setup button until the LED light flashes amber, then flashes white.
If none of these steps work, contact Apple Support for further assistance.
Issue 2: Poor Sound Quality
If you experience poor sound quality while using your AirPods with your MacBook, try the following troubleshooting tips:
- Ensure that your AirPods are clean and free from debris.
- Check the audio settings on your MacBook and adjust them if necessary.
- Update your MacBook’s software to the latest version.
- Try disconnecting and reconnecting your AirPods to refresh the connection.
If the sound quality issue persists, consider contacting Apple Support for further assistance.
Additional Tips for a Seamless Experience
Here are some additional tips to enhance your experience when connecting AirPods to your MacBook:
Tip 1: Keep your AirPods Charged
Make sure your AirPods are always charged, so you can enjoy uninterrupted usage. Consider investing in a wireless charging case to conveniently charge your AirPods.
Tip 2: Use the Find My App
If you misplace your AirPods, you can use the Find My app on your MacBook to locate them. This feature can be a lifesaver if you often misplace your earbuds.
Tip 3: Update your MacBook Software
Regularly update your MacBook’s software to ensure compatibility and take advantage of the latest features and improvements.
By following these steps and tips, you can seamlessly connect your AirPods to your MacBook and enjoy a wireless audio experience like never before. Say goodbye to tangled wires and hello to convenience and high-quality sound!
Key Takeaways: Seamless Sync: How to Connect AirPods to MacBook
- Connecting your AirPods to your MacBook is simple and convenient.
- Make sure your AirPods are in pairing mode by opening the lid of the charging case.
- Go to the Apple menu on your MacBook and click on “System Preferences.”
- Select “Bluetooth” and ensure that the Bluetooth is turned on.
- Your AirPods should appear in the list of available devices. Click on them to connect.
Frequently Asked Questions
Connecting your AirPods to your MacBook has never been easier. Here are some common questions and answers to help you seamlessly sync your AirPods and MacBook.
1. How do I connect my AirPods to my MacBook?
To connect your AirPods to your MacBook, follow these simple steps:
1. Open the lid of your AirPods case and make sure Bluetooth is turned on in your MacBook’s settings.
2. On your MacBook, click on the Apple menu in the top left corner and select “System Preferences.” Then, click on “Bluetooth.”
3. In the list of available devices, you should see your AirPods. Click on them and select “Connect.”
That’s it! Your AirPods are now connected to your MacBook and ready to use.
2. Can I connect my AirPods to multiple MacBooks?
Yes, you can connect your AirPods to multiple MacBooks. However, they can only be connected to one MacBook at a time.
To connect your AirPods to a different MacBook, simply follow the same steps mentioned earlier to connect them to the new device.
Keep in mind that if your AirPods are connected to one MacBook and you try to connect them to another, they will automatically disconnect from the first MacBook and connect to the second one.
3. How do I switch between my AirPods and internal speakers on my MacBook?
To switch between your AirPods and the internal speakers on your MacBook, click on the volume icon in the menu bar at the top of the screen. From the dropdown menu, select your AirPods or internal speakers.
You can also go to “System Preferences” > “Sound” and choose your preferred output device from the list.
This allows you to quickly switch between using your AirPods and your MacBook’s internal speakers depending on your needs.
4. Can I adjust the AirPods volume directly from my MacBook?
Yes, you can adjust the volume of your AirPods directly from your MacBook. The volume buttons on your MacBook’s keyboard can be used to control the volume of your AirPods.
If the volume buttons don’t seem to work, make sure your AirPods are properly connected to your MacBook and that the audio is not being routed to any other device.
You can also adjust the volume by clicking on the volume icon in the menu bar at the top of the screen and using the slider to adjust the volume level of your AirPods.
5. How do I disconnect my AirPods from my MacBook?
To disconnect your AirPods from your MacBook, follow these steps:
1. Make sure your AirPods are out of your ears and not in use.
2. On your MacBook, click on the volume icon in the menu bar at the top of the screen.
3. From the dropdown menu, hover over your AirPods and click on the “x” next to them to disconnect.
Your AirPods will now be disconnected from your MacBook, but you can easily reconnect them by following the steps mentioned earlier.
Summary
Connecting AirPods to your MacBook is super easy! Just make sure your AirPods are charged and in their case, then go to the Bluetooth settings on your MacBook. Select your AirPods from the list and click “Connect.” Voila! Your AirPods are now seamlessly synced with your MacBook.
With your AirPods connected to your MacBook, you can enjoy wireless audio while watching movies, listening to music, or video chatting with friends. The convenience of this wireless connection allows you to move freely without any cords getting in the way. So go ahead, give it a try and enjoy the seamless syncing of your AirPods and MacBook!

Affiliate Disclosure: Tech24BD.xyz is a participant in the Amazon Services LLC Associates Program, an affiliate advertising program designed to provide a means for sites to earn advertising fees by advertising and linking to Amazon.com